Configuring UgCS Commander
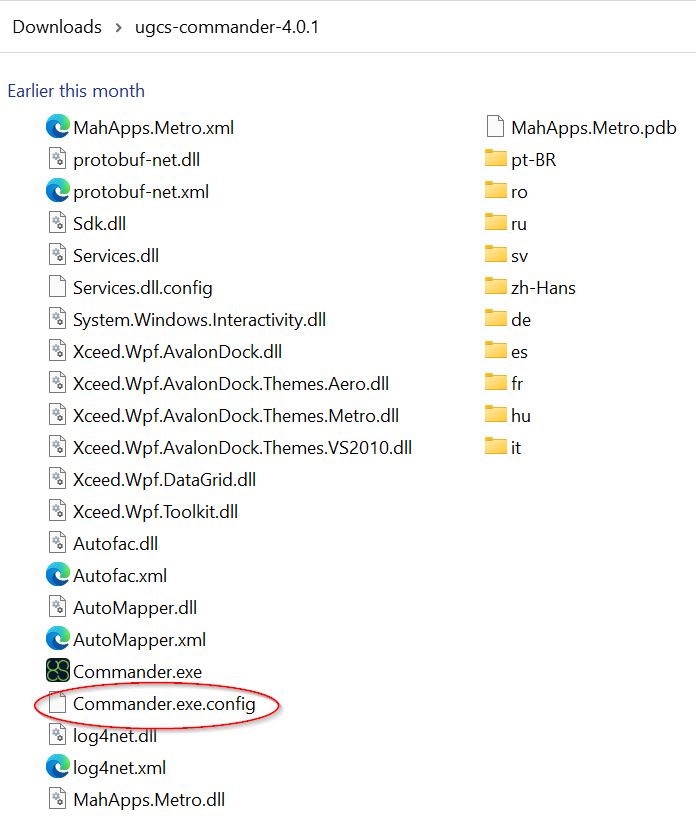
This setting defines the name of the default route for the specific vehicle. Please note that it is possible to select a different route for the corresponding vehicle in Commander later. To properly set up UgCS Commander one must edit the Commander.exe.config file typically located in the received archive folder
The following settings should be changed in this configuration file:
• Names of the vehicles used
• Default route name for each vehicle
• Geo-fence radius, altitude, and polygon
• Edit vehicle groups
<add internalid="1" name="APM-101" defaultroute="1" supervisor="User 1" fenceradius="100" fencealtitude="120" polygonfence="false"/>
This is one line from Commander.exe.config containing the vehicle settings for reference.
Names of the vehicles used
It is necessary to specify the names of the vehicles that will be used before any vehicles are displayed in the UgCS Commander. By default the vehicle names are in Commander.exe.config file are set to 1, 2, 3..,etc. (name="1", name="2", name="3",..). It is possible to either set the vehicle names for connected vehicles according to this within the UgCS client or to change the Commander.exe.config file to match your connected vehicles.
Default route setting
This setting defines the name of the default route for the specific vehicle. Please note that in Commander later it is possible to select a different route for the corresponding vehicle.
Vehicle group settings
<groups><add internalid="1" name="Group-1" vehicles="1,2,3,4,5,6,7"/> <add internalid="2" name="Group-2" vehicles="8,9,10,11,12,13, 14"/> <add internalid="3" name="Group-3" vehicles="15,16,17,18,19,20"/> </groups>
This sample illustrates how 20 vehicles could be split up to be controlled by three operators. One vehicle can have an infinite number of operators (two operators can control the same vehicle) and it is possible to add new groups just by creating a new line by the same pattern, for example:
<add internalid="4" name="Group-4" vehicles="7, 10, 14, 19”/>
Updated about 1 year ago