Taking off and running the drones
When the routes are finished, it is time to work with UgCS Commander. First, check that the vehicles are connected and correctly displayed in UgCS Commander. For ease of use, it is possible to filter the vehicles and display only the ones necessary – see the section Filter by Operator or status tab.
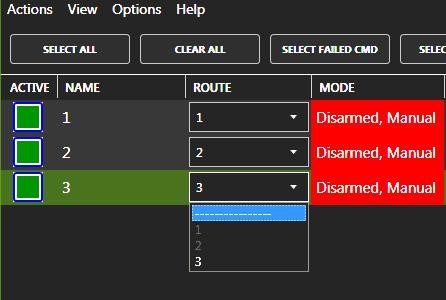
The next step is to assign correct routes to the specific vehicles – make sure that the intended route is assigned to the correct vehicle. In case it is necessary to assign an already assigned route to another vehicle, one must first clear the existing assignment as shown in the Image.
When correct routes are assigned, the actual flying may begin. A convenient feature is the ability to change the location of the last waypoint according to the location of the drone, the feature is described in the section Actions and Options tab. It is strongly recommended to use this action to ensure that the vehicle returns exactly to the start location.
The next step would be to set the take-off point altitude, which makes sure, that route is calculated according to the altitude of the drone (assuming that the vehicles are on the ground). Then the routes must be calculated and afterward, routes upload follows by clicking the “Upload & Fence” button.
After all, routes have been successfully uploaded, it is time to Arm motors and take off, using commands “ARM” and “TAKEOFF”. As soon as the vehicles will reach any waypoint with the “Hold” action, the status will appear displaying “Waiting at # ..” then using the “Continue” command vehicles will continue to the next waypoint.
If an unpredicted situation occurs, the vehicle can be held in place using the “HOLD” action, afterward using Click & Go function in UgCS or the “Return to home” command in UgCS Commander vehicle can be landed safely.
Updated about 1 year ago